The Lexicon: A Design Diary


One of the things I latched onto in order to stay sane during the pandemic was mechanical keyboards, which have become a major hobby and side hustle. I run an Etsy shop called WeirdLittleKeebs, where I sell both open-source and original designs. Some days I'm more motivated than others, but it's generally a lot of fun, despite all the frustrations misbehaving keyboards can create. They're a relatively simple piece of technology, and a lot more resistant to enshittification than the computers they connect to. No one's going to buy out my keyboards and try to shoehorn AI or crypto into them, and there's no way to require a monthly subscription. I've been working on a book on DIY keyboards titled "Weird Keyboards," though I've neglected it long enough that it needs to rewriting to keep up with current trends. I've now designed three keyboards, and this is the story of the Lexicon, which is easily my most ambitious so far.
Shift Happens is Marcin Wichary's masterpiece, a massive two-volume tome about the history of keyboards, from the earliest typewriter prototypes up to the present day. I was lucky to get a copy through the Kickstarter, because apart from a small number of leftover copies sold after the crowdfunding campaign concluded, it hasn't been available to purchase since. I really hope the book gets a second printing, because it's pretty phenomenal.
At the time I'd been struggling to focus on reading in general, but when Shift Happens arrived, I raced through its 1,200 pages. I rekindled my love of reading, learned a lot, and ended up keeping a running list of keyboard ideas, six in all. Most were silly gimmicks, albeit the kind of silly gimmicks that some keyboard people eat up. These included a keyboard with separate keys for upper and lower case (something some early typewriters tried), a 5-key Baudot code keyboard, a keyboard where you pick characters with a knob (inspired by index typewriters and label makers), and an ergonomic number pad.
The most promising was what would become the Lexicon, the idea being to make a keyboard aimed at writing prose. I decided to write about the endeavor, to show what my process was like and what I encountered along the way. My experience wasn’t typical—not many keyboards that have mascot characters—but so few people design keyboards that I don’t know what a “typical” process would look like. It was a distinctly personal process, and as with my writing, I created something no one else would have done in quite the same way.
The otherwise well-made Vortex Core’s difficult to access quotation mark keystrokes (Fn-B for single quotes, Fn-Shift-B for double quotes) got me thinking about how to make a keyboard optimal for writing. There are keyboards for a variety of specialist applications like playing games and video editing, but writing devices just get standard QWERTY keyboards. Making relevant punctuation more accessible was definitely part of how I would approach the writing keyboard concept. Quotation marks and such would be readily available, and things like the em dash (—) would be in easy reach too. That was a start, but not enough to call it a writing-oriented keyboard.
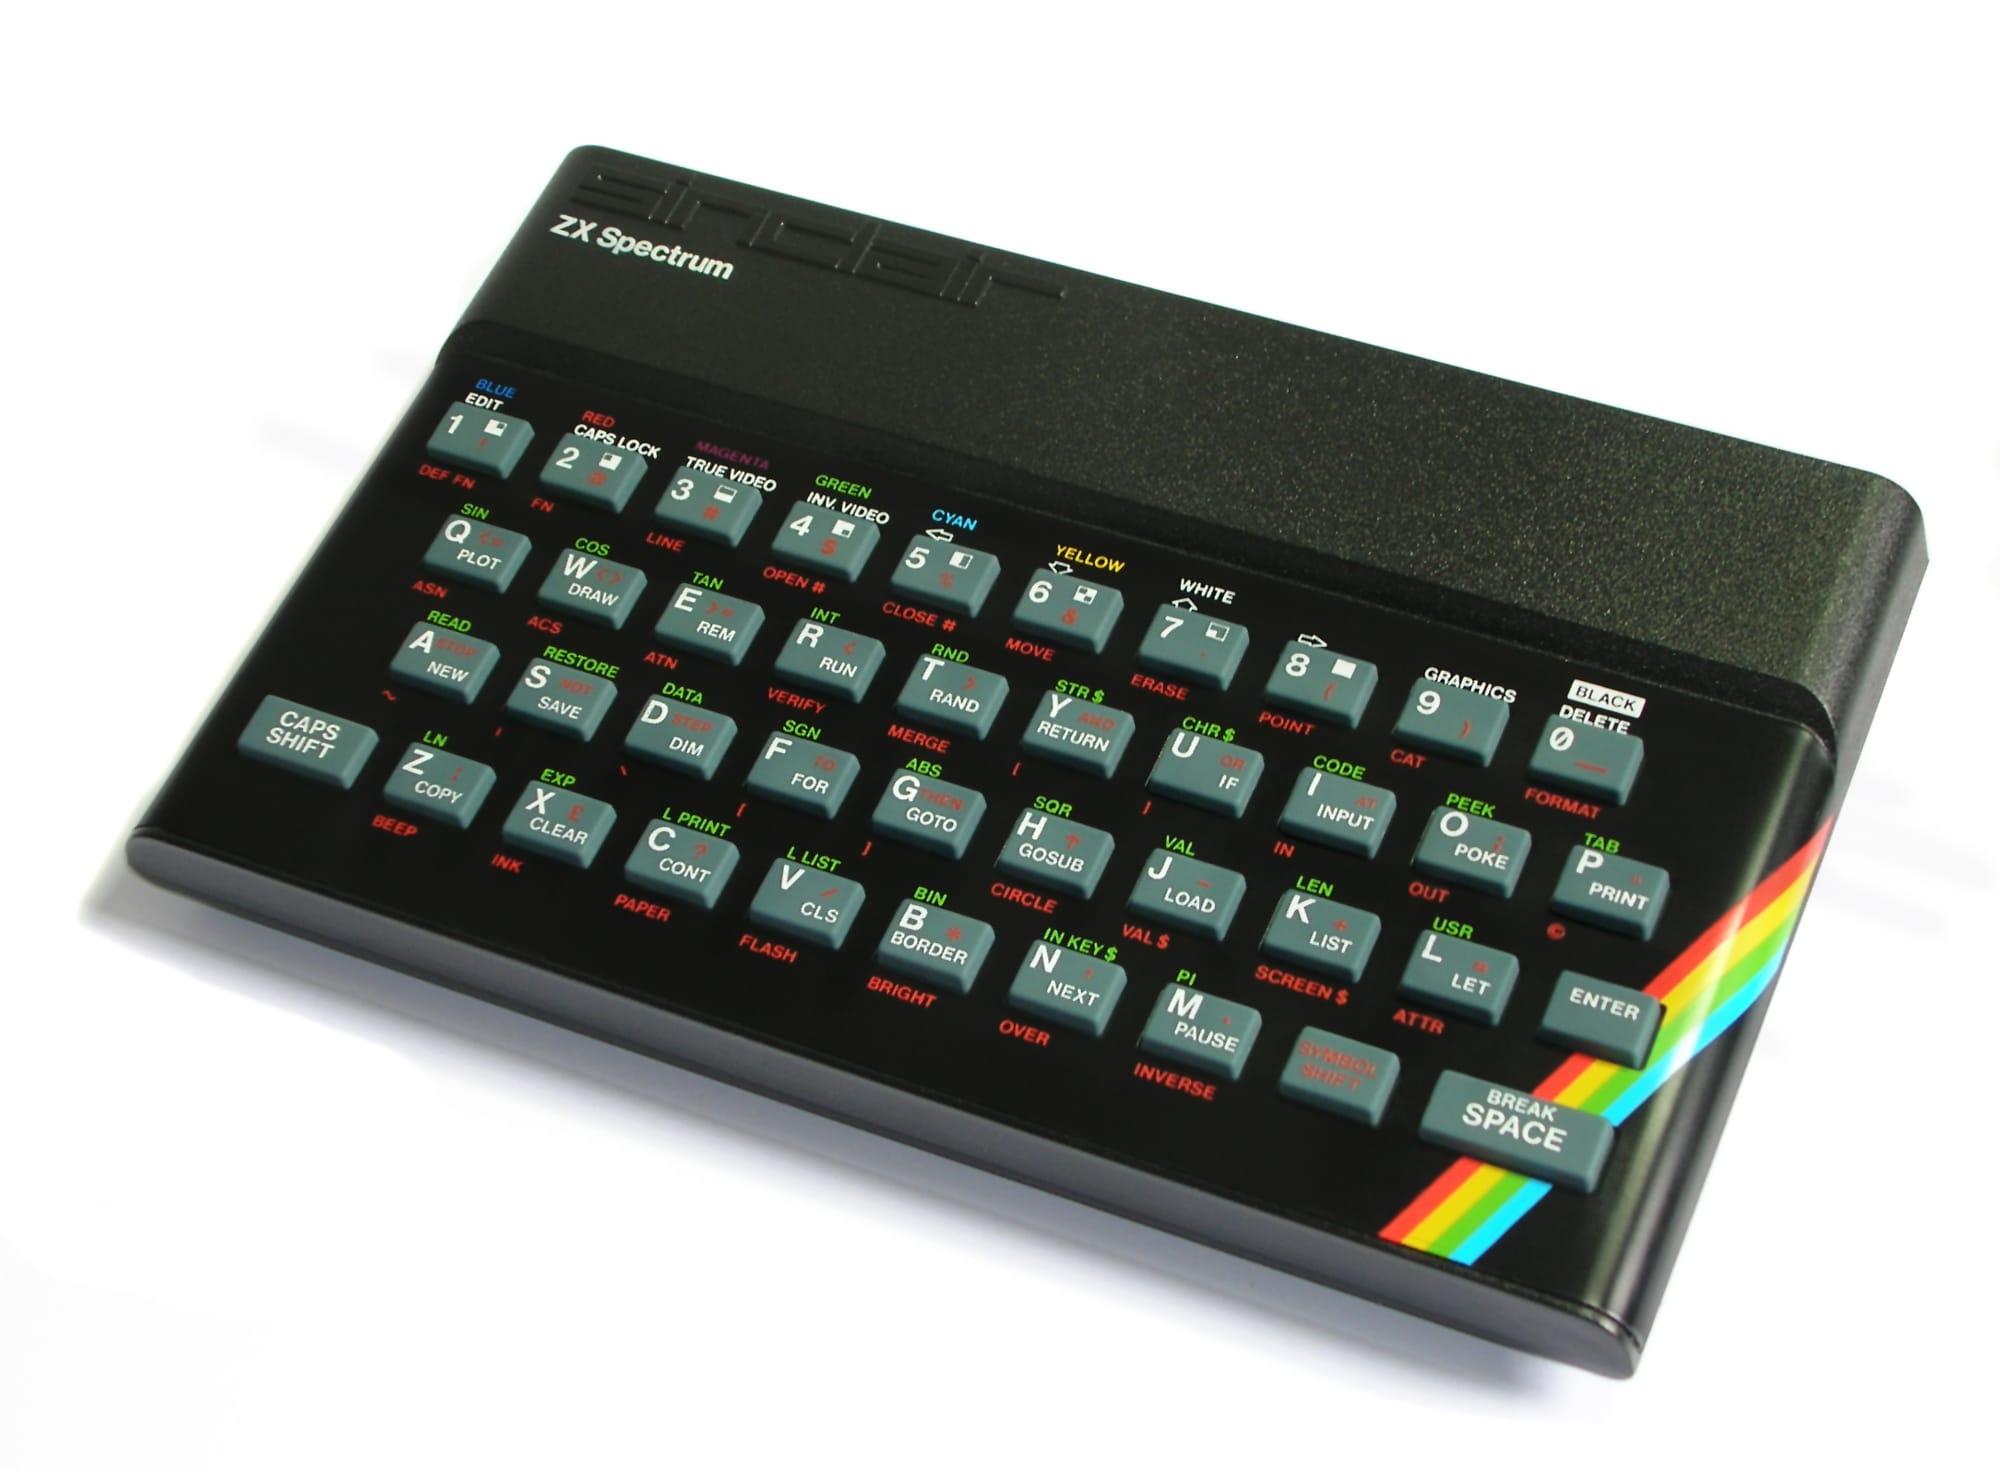
Luckily, Shift Happens included something that gave me the inspiration I needed, with a history of the Sinclair ZX Spectrum and its keyboard. That keyboard has a mere 40 keys, so it uses a combination of a “Symbol Shift” key and the computer interpreting keystrokes differently in different contexts to include not only symbols and other important controls, but shortcuts for BASIC programming commands. This both cut down on how much unpleasant typing you had to do on its little membrane keyboard and made it easier for the computer to store programs more efficiently. For both the user and the computer, “GOTO” (on the G key) was one thing instead of four. Any human language has a much larger vocabulary than BASIC (even Toki Pona), but there are enough common words that shortcuts could still be beneficial. Hobbyist keywords typically use an open-source firmware package called QMK, which does have the ability to have keystrokes trigger outputs of entire strings, as well as Unicode characters.
There are already various tools that turn a small number of keystrokes into full words, and I didn’t want to reinvent the wheel. Anyone who wants to do full-on stenography can with the help of Plover and various affordable and open-source steno keyboards. One of my first keyboard designs was a simple steno keyboard called the Peridot in fact. For a steno-like system on a more standard keyboard there are the various CharaChorder models, including one that comes in the form of a USB dongle and works with your regular keyboard. Instead, this was going to be for people who want a more normal keyboard that can give them a small boost. For a few people it might be a gateway drug, but I’d be more than satisfied if there were some people out there who used, enjoyed, and benefited from my writing keyboard.
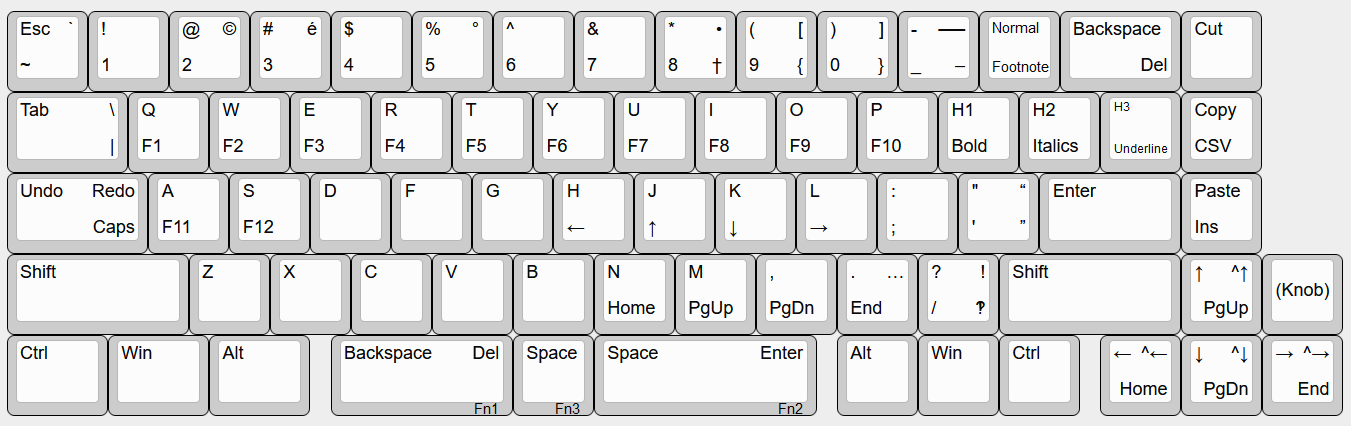
I started by playing around with layout concepts in the Keyboard Layout Editor, taking a standard 65% layout and modifying it. It would have a split spacebar that would do double duty for accessing layers. Tap the left-hand spacebar to get a space, hold it down and the other keys produce various symbols instead of their usual letters. I took some of the less commonly used keys (brackets, backslash, etc.) and tucked them away on other layers in favor of keystrokes related to the keyboard’s core mission. If I were to make a version aimed at coding those could be vitally important, but you rarely use brackets when writing prose.
Another notable thing I ended up adding was hotkeys for common formatting commands. I started using computers with a Commodore VIC-20 and then an 8088-powered MS-DOS machine, and while I happily took to using Macs at school and eventually Windows at home (and more recently a MacBook and various iOS devices), I’ve retained a belief that it should be possible to do stuff with just a keyboard. In 1968, Douglas Engelbart gave a presentation that would later become known as the "Mother of all Demos." He was showing off his team's NLS (oNLine System), a pioneering computer system with a GUI and even video conferencing. They'd realized that using the mouse meant you had to take one hand off the keyboard, which limited your ability to type. Their solution was a "keyset," a device with five keys. This was a simple chording keyboard, which let a skilled user enter basically any keystroke with one hand. It has a definite learning curve, and while Xerox implemented it on their Alto computer, when Steve Jobs visited Xerox and got ideas for the Macintosh, the keyset was one of the casualties of his ruthless quest for intuitive simplicity. Even without going as far as a keyset, there’s something to be said for reducing how often you have to switch to using the mouse if you’re in the middle of doing something primarily based on two-handed typing.
For about a decade now (what the hell) I’ve had a series of jobs as a peon contractor for different big tech companies, and one thing I’ve learned is that no matter how polished a company’s consumer products are, their internal tools probably suck. Their software engineers are overworked, and our bosses can just barely get the engineering bandwidth to keep stuff from breaking. UI improvements are generally off the table, and in a few cases I ended up taking matters into my own hands. One time I made a JavaScript tool for opening specific tabs, and later while working remotely I configured a 23-key macropad to massively cut down on repetitive keystrokes. There are still inevitably a lot of things you have to do with the mouse, and every single time they ask for feedback on internal tools, I ask for more keyboard shortcuts. Those pleas have always fallen on deaf (or at least overworked) ears.
Microsoft Word is one of those applications that’s so expansive that no single person in the world uses everything it can do. I probably use more than most, but mail merges are still a mystery to me. It has tons of keyboard shortcuts, but unless you comb through Microsoft’s list of shortcuts, they’re oddly hard to find. When I looked through the list of shortcuts on the Microsoft website, I learned for the first time that Word has a “spike” function for copying and pasting multiple items. It sounds neat, and I’m guessing that hardly anyone even knows it’s there. Obviously I can’t include every Word command, but there are some common ones I’d like to have in easy reach. Bold and italics, Normal and Header styles, and adding footnotes.
What’s in a Name?
I felt I was on to something, and I tried to brainstorm a name for the thing. I initially gave it the placeholder name of “Thalia,” after the Greek muse of comedy and idyllic poetry. That didn’t quite feel right, and I started making a list of possible names, looking through lists of names of authors and typewriters. Among the names I considered were:
- Bradbury
- Underwood
- Lettera
- Shōsetsuka (小説家; the Japanese word for “novelist”)
- Corona
- Umbra (like the opposite of a corona)
- Ember (like Kindle kinda?)
- Gibson
In the lists of typewriters, I came across the Olivetti Lexikon 80. Olivetti is an Italian company that was once a big player in the typewriter industry, and they had some of the most beautiful typewriters on the market. Lexikon with a K was their thing and presumably trademarked, so I decided on “Lexicon” plus the number of keys on the keyboard. It was something subject to change, but when I looked at the summary in the editor, I saw that I had 69 keys. I was possibly heading towards making the “Lexicon 69,” which was suggestive but a bit too eye-catching to dismiss. I planned to later do a split ergonomic version, which would get a name along the lines of “Lexicon Ergo.” A 100% version with a numpad could be the “Lexicon Unabridged,” and so on.
Proto-Prototype #1: Raccoon Dog Edition
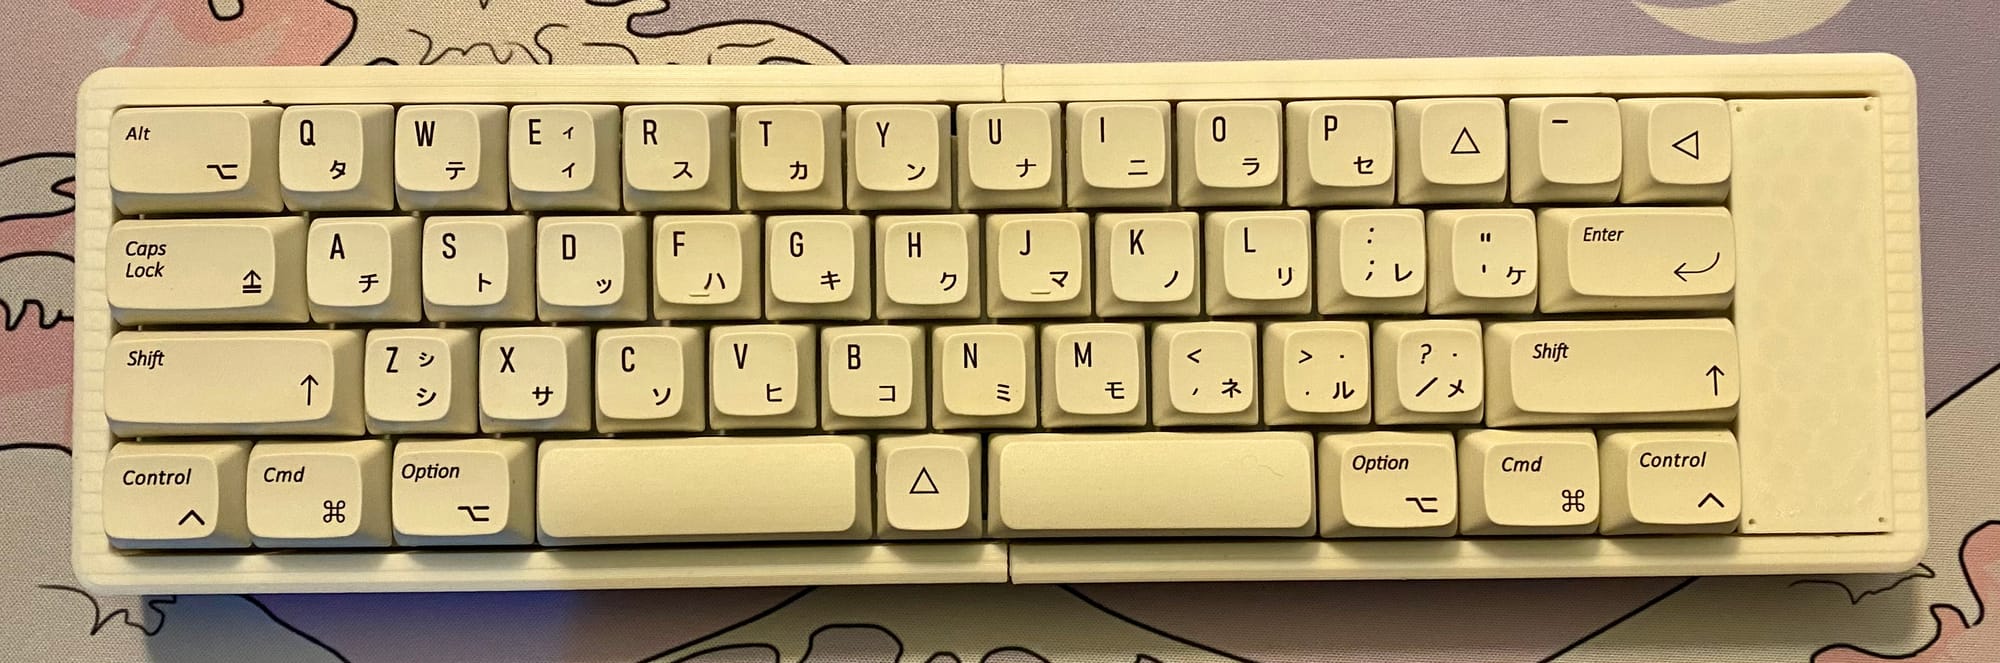
Before I got into turning that design into a reality, I decided to explore the general concept using an existing design. Since a split spacebar was a critical part of the whole approach, I settled on building a Tanuki keyboard and creating a heavily customized keymap in the firmware. Since the Tanuki only has 42 keys, it did feel a bit cramped for all the keystrokes and features I wanted to implement, but it was a start.

I ran into a bit of frustration because the Unicode character output wasn’t working. It turned out there were two main issues, though both were solvable once I figured out how. The first was that the keyboard and OS need to be configured for the same method of Unicode input. The input protocols keyboards use don’t support Unicode, and instead you’re configuring your keyboard firmware to deliver a sequence of a particular command and the hex code for the desired character. According to the documentation Windows’ built-in method is unreliable, so they recommend installing an app called WinCompose.
The other issue was that my QMK installation was out of date, so it wasn’t recognizing some of the functions laid out in the documentation. I initially sifted through the existing keymaps and found the older versions of the commands and keycodes, but removing and reinstalling QMK MSYS made it work like in the documentation.
After a lot of flailing and ten or so attempts at compiling with varying degrees of success, I had the firmware working. The shortcuts worked! It was a little hard to always remember that they were there, and I’d catch myself backspacing after typing a word so I could use the shortcut. Not ideal, but it didn’t interfere with my typing per se. As with any new keyboard thing, it took some time to get used to the changes, but regular QWERTY typing worked just fine.
I took to using it a good amount and made a series of minor refinements as I went. I added some more word shortcuts (notably for “this” and “that” on Tab and Caps Lock) and decided to get into creating combos to implement even more common words as shortcuts. "Combos" in QMK let you set up keystrokes that happen when the user presses two or more keys simultaneously. That proved a lot more annoying than I’d expected, because it turns out that in the keymap, the IDs for QMK combos have to be in all upper and lower case in specific places across the three different declarations of them that you have to do. I also had to lower the combo timing so that it didn’t cause too many false positives while doing normal typing. Once I had that sorted, I found that having a set of two-key shortcuts for even more words was pretty nice. It’s easy to forget that the shortcuts are there, but typing normally without the shortcuts isn’t a problem as long as it all works. My steno practice made me miss having shortcuts for basically everything, but that’s not the goal for the Lexicon project.
Overall, I found it just plain fun to use. It makes writing into sort of a puzzle or game where I can save myself time by remembering the shortcuts. I wasn’t using the extended punctuation too much, but that’s another thing that isn’t a problem per se.
Pre-Prototype #2: Soroka
While working on the Lexicon I came across an open-source 40% keyboard called the Soroka. “Soroka” (сорока) is the Russian word for “magpie” and a pun on the word for “forty” (sorok/сорок). It has fewer keys than my Lexicon design, but it’s not quite as minimal as the Tanuki. It also has the option to have a three-part space bar similar to what I was going for with the Lexicon, so it was a natural choice for another iteration. I put in an order for some PCBs and top plates and 3D printed a case.
I wasted two PCBs before I got one working, so I wasn’t at my best. In my defense, I’m bad at doing the thing where the MCU has little notches (castellations) and you solder it sitting flat on the PCB, because it’s hard to get those aligned exactly right. After a bunch of flailing, I was able to get it working. Although the various spacebar configurations are all properly wired on the PCB, the firmware wasn’t set up to recognize them. I was able to figure out how to fix that, though I had a bit of trial and error determining which physical key corresponded to what part of the firmware keymap. This was about when I switched to implementing the combos via the dictionary method, where it takes the form of a separate dictionary file in which you only have to define each combo once.
Between the larger number of keys and a desire to ensure they all had something on the symbols layer, I ended up spending some time going through Wikipedia articles about punctuation and typographical symbols. I’d already included things like the em dash and even interrobang, but in the age of Unicode, a computer can display around 150,000 distinct symbols, most without a good way to input them. You have to be a pretty massive nerd to know what a manicule (☞), fleuron (❧), or asterism (⁂) even is, and despite everyone learning it in school, computers have made the division sign (÷) oddly hard to come by.
This was now close to what I was after for the Lexicon, and in putting it through its paces I found myself adding more word combos. For a while hobbyist keyboards commonly used the Pro Micro microcontroller unit (MCU), a little development board sporting an ATMEGA32U4 chip. It can store a mere 32k, which is enough for most keyboards, but definitely not for the Lexicon. The Soroka uses an RP2040-Zero, a smaller MCU powered by Raspberry Pi's RP2040 microcontroller. RP2040 boards vary in their storage capacity, but it's measured in megabytes rather than kilobytes. There are ways to make firmware smaller, but my Soroka's firmware quickly grew to 64k. That was about when I decided the Lexicon was going to use an RP2040. It also has the advantage that flashing the firmware is easier and doesn’t require installing a separate application.
I waffled a bit as to whether to have a number row on the final keyboard. I get by just fine without one on my Microdox and Humla, but every time I had to type numbers with my Soroka configuration, I found it a bit annoying, more so than on my weird split keyboards. I considered having a number pad to one side, but when I talked to my friend Steven Savage about it, he said that people expect a number row. Ultimately, I’m aiming to make something that writers who aren’t mechanical keyboard hobbyists can benefit from. That meant at least one more bit of prototyping.
Premature Documentation
I’m a writer and TTRPG designer, so the way I approach projects has some of that influence, in ways that are sometimes foreign to technical people. For the Lexicon I started writing a manual, which would include not only the basics, but info on customization and even tips for using it well. One of the major things I’d found putting various iterations through their paces was that I shouldn’t sweat the shortcuts, but when I am using them, it’s handy to be aware that you can output part of a word and then type the rest. “You” from the shortcut can become “your” or “you’re” with ease. I later added a combo where UR becomes “you’re,” but you get the idea.
One notable issue the manual got me to confront is that since I wanted to have shortcuts for formatting commands in word processors, I’d ideally want to have some pre-made firmware files for different platforms and apps. Word for Windows is my own go-to, but I wouldn’t for a second fault anyone who doesn’t want to put up with Microsoft. Between Apple’s popularity with creative people and the simple fact that I use a MacBook Air and iPad Mini for on-the-go writing, I wanted a version for macOS, and LibreOffice Writer also demanded attention. I didn’t think I needed to worry about Pages (part of the office suite that’s free with Apple devices), but Google Docs was another obvious one. I got a little annoyed at how none of these had quite the same shortcuts, but that’s technology for you.
I had the thought that I should look for actual stats on what word processors are the most popular, but trying to search online just got me paywalled studies and off-topic websites. The only real insight I got is that Microsoft Office is still the dominant office suite, even with so many alternatives that are cheaper or even free. I found one webpage saying that Word still has a 65% market share, though without citing a source. Nonetheless, on a statistical basis, making Word for Windows the default makes sense, for better or for worse.
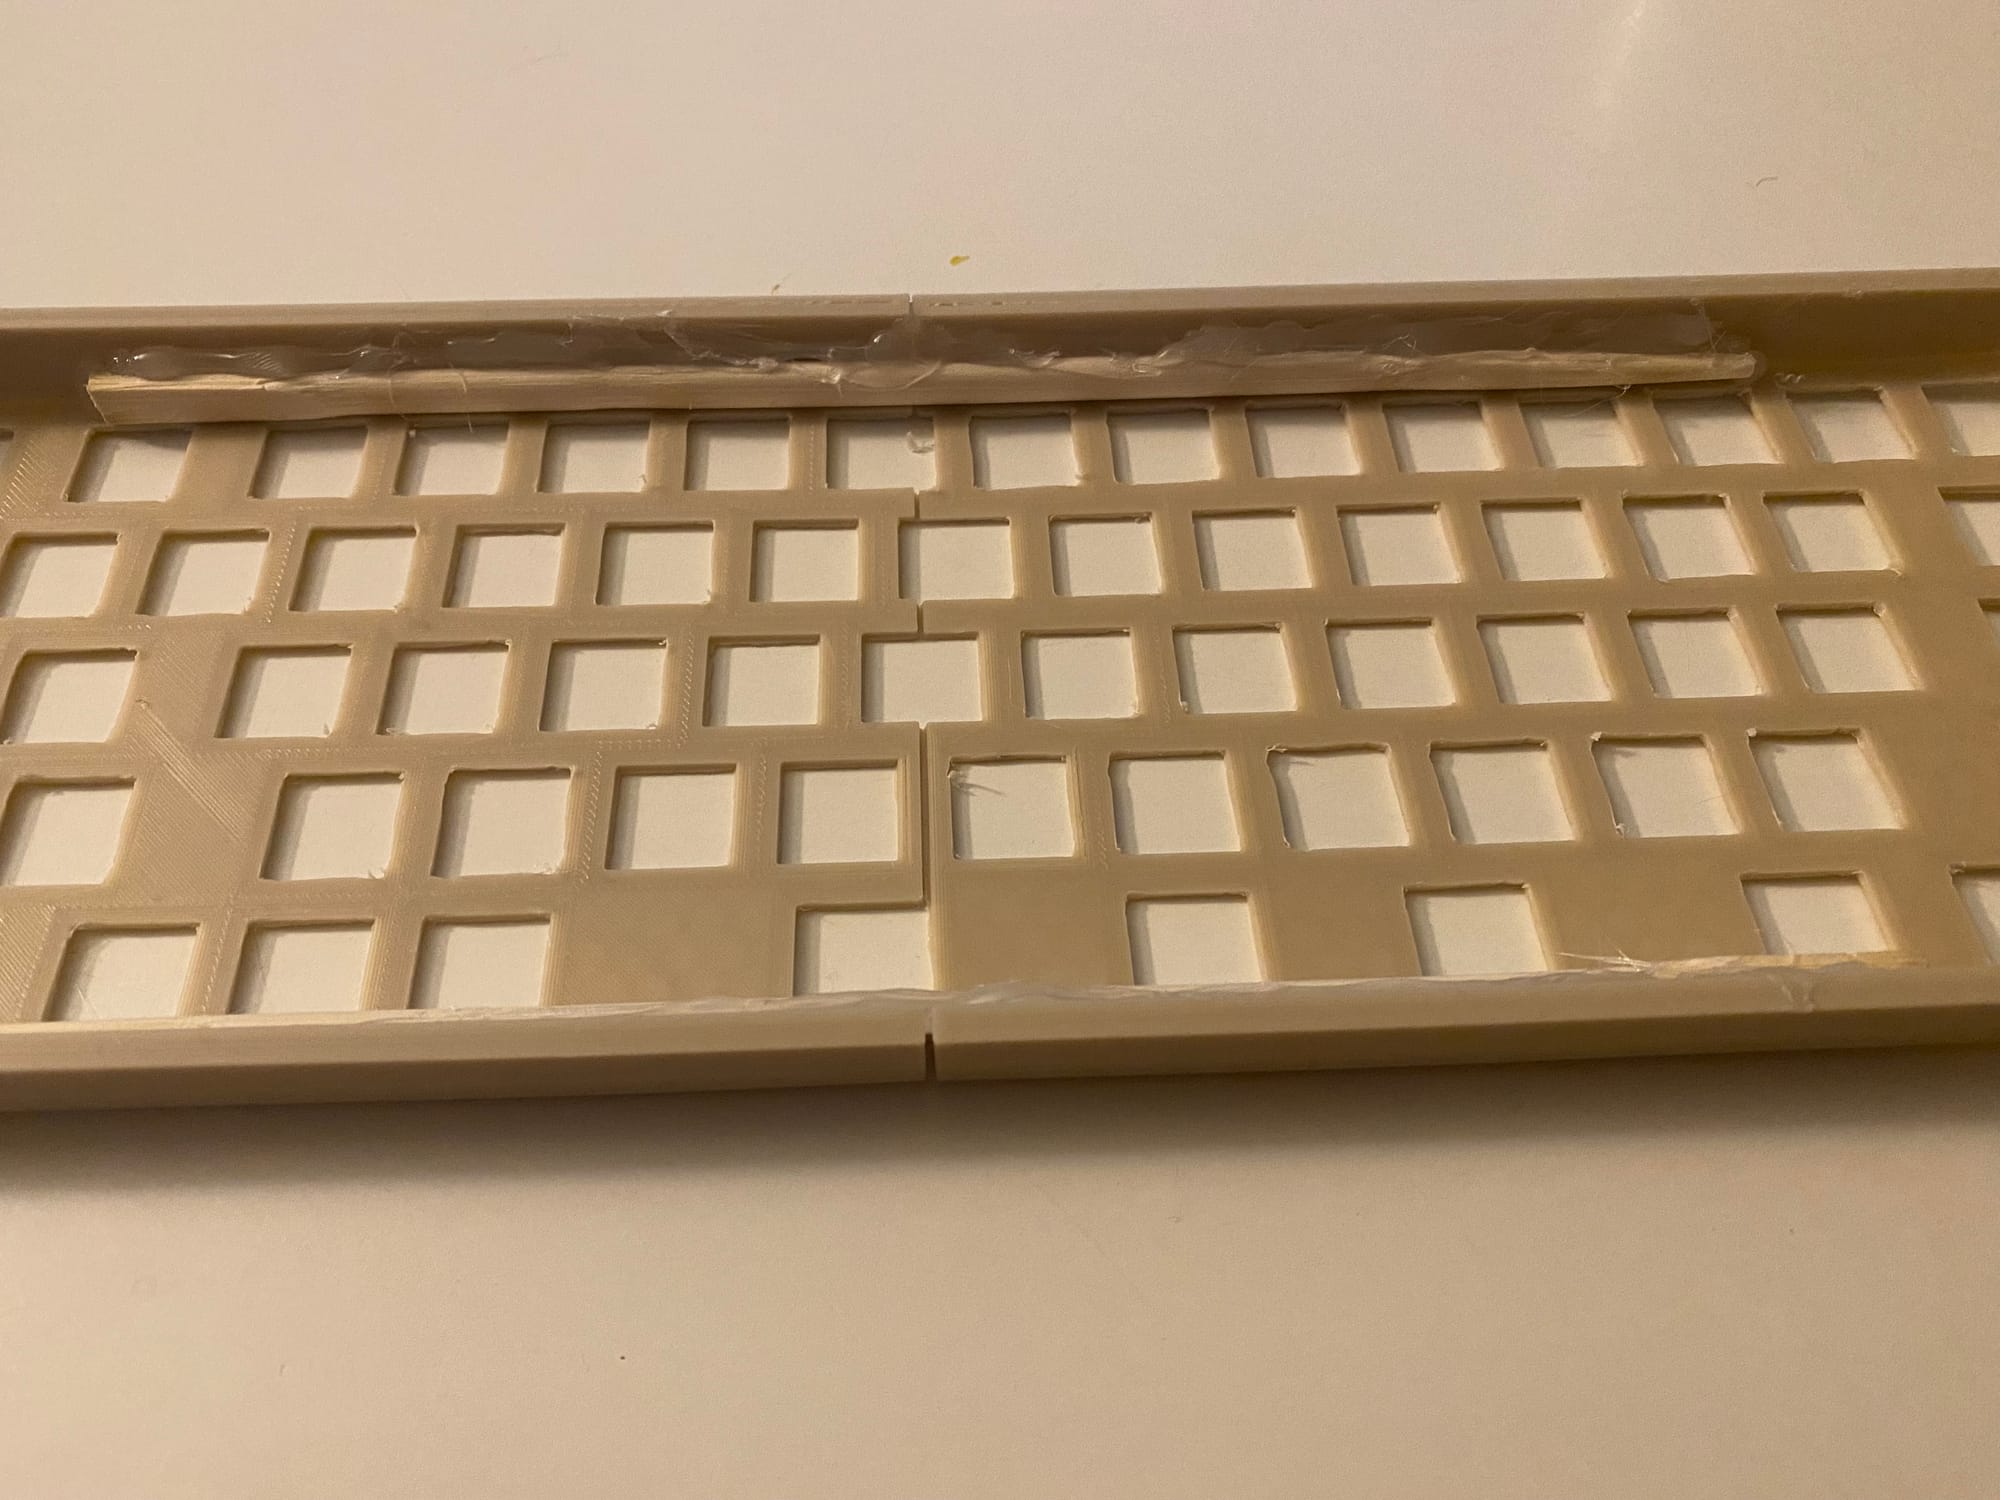
Pre-Prototype #2½: Failed Handwire
As the heading says it ended it failure, but I made an attempt at a handwired prototype. It’s easy to convert a KLE JSON file into a 3D printable shell. Even with my huge Guider II printer (which I've since gotten rid of) I still had to print it in two pieces, which I then joined together using hot glue and disposable chopsticks. It had enough rows and columns that I had to use a Raspberry Pi Pico as the controller, but that part was easy. The end result however had numerous switches that either didn’t work or triggered multiple keystrokes. At that point I didn’t feel like fighting with it any further, so I set it aside and started looking for something different I could use.
Pre-Prototype #3: Consternation
The Mt. Choc I’d built around the same time uses KMK (a newer firmware package that uses CircuitPython), and while I was able to get the “Words” layer and some other tweaks done, combos and Unicode output refused to work. KMK has a small enough community that there’s only so much information available, and a user on the one discussion board mentioned that “combos are our weak spot currently.” Those features are apparently finnicky and prone to not working depending on what other modules you include and in what order. To properly experiment with the concept, I really needed a QMK-powered 65% keyboard with a split spacebar. I kind of ran into a wall there, in that every keyboard I found listed with the right layout either didn’t use QMK or didn’t seem to have any keymaps available.
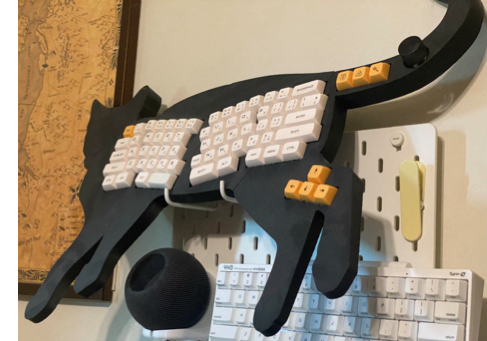
Then I remembered that I had my FinnGus keyboard up on the wall, visible from my computer desk if I turn my head slightly to the left. There was a small keyboard shop called Pikatea (no longer operating sadly), and a while ago I participated in his group buy for an Alice-layout keyboard with a 3D-printed case shaped like a cat. When the kit had arrived, I’d quickly built it (using Momoka Frog switches and XDA keycaps), put it up on the wall, and largely ignored it. But it seemed its time had arrived. The cat-shaped case made it a bit unwieldy for my crowded, chaotic desk, but this would be a relatively short-term thing for testing.
I originally used a BIT-C (a Pro Micro clone with a USB-C connector) but given the size of the firmware I switched it to an Adafruit KB2040 (an RP2040-powered MCU with a Pro Micro footprint). Luckily I had "socketed" the BIT-C, meaning I used a socket so I could remove it with relative ease. The build guide for the FinnGus taught me the trick of using diode lead trimmings as pins for the sockets, which much cheaper than buying purpose-made pins.
By this point I was an old hand at implementing versions of my Lexicon layout, and the most time-consuming part was finding even more Unicode characters to populate the symbols layer. I took the opportunity to include the tricolon (⁝), an obscure and not especially useful punctuation symbol that appeared on some early typewriters. Even in the age of Unicode, when computers can handle practically any character or symbol used in any human language, keyboards and UI design makes some glyphs hard to access. You have to wonder how writing might be different in general if typewriter and computer keyboard designers made different choices. Since the shuffling of keys left the H without anything for the symbol layer, I assigned it to the heart character (♥), on the principle that I feel like people ought to use it more.
I also made it so that on the Words layer, each number key output the word in letters (one, two, three, etc.), since it would be both handy and intuitive. On top of that I added “.com” to the period key on the Words layer, which is one of the most useful shortcuts on smartphone keyboards.
The FinnGus’ unwieldy size led me to wait a while before seriously getting into trying it out, and when I did… it turned out to have an incredibly bad double-typing issue, where one keypress would produce two or more of the same keystroke. Normally when that kind of thing comes up, you’d increase the debounce value in the firmware, but that did nothing at all. I tried switching to a SparkFun RP2040 MCU, which made the keyboard not work at all, and when I switched it back to the BIT-C, it worked just fine. So apparently there’s some terrible, unknowable interaction between my FinnGus and the RP2040 that destroyed any chance of it working right. I love mechanical keyboards, but like a lot of technology these days, sometimes they just sort of decide not to work. I put my FinnGus back together and put it back up on display. Issues aside, I’d found it pleasant to use, though the Alice layout took some getting used to. The one time I pressed the key for applying the Header 1 style it worked perfectly and felt really nice to have, so there was that at least.
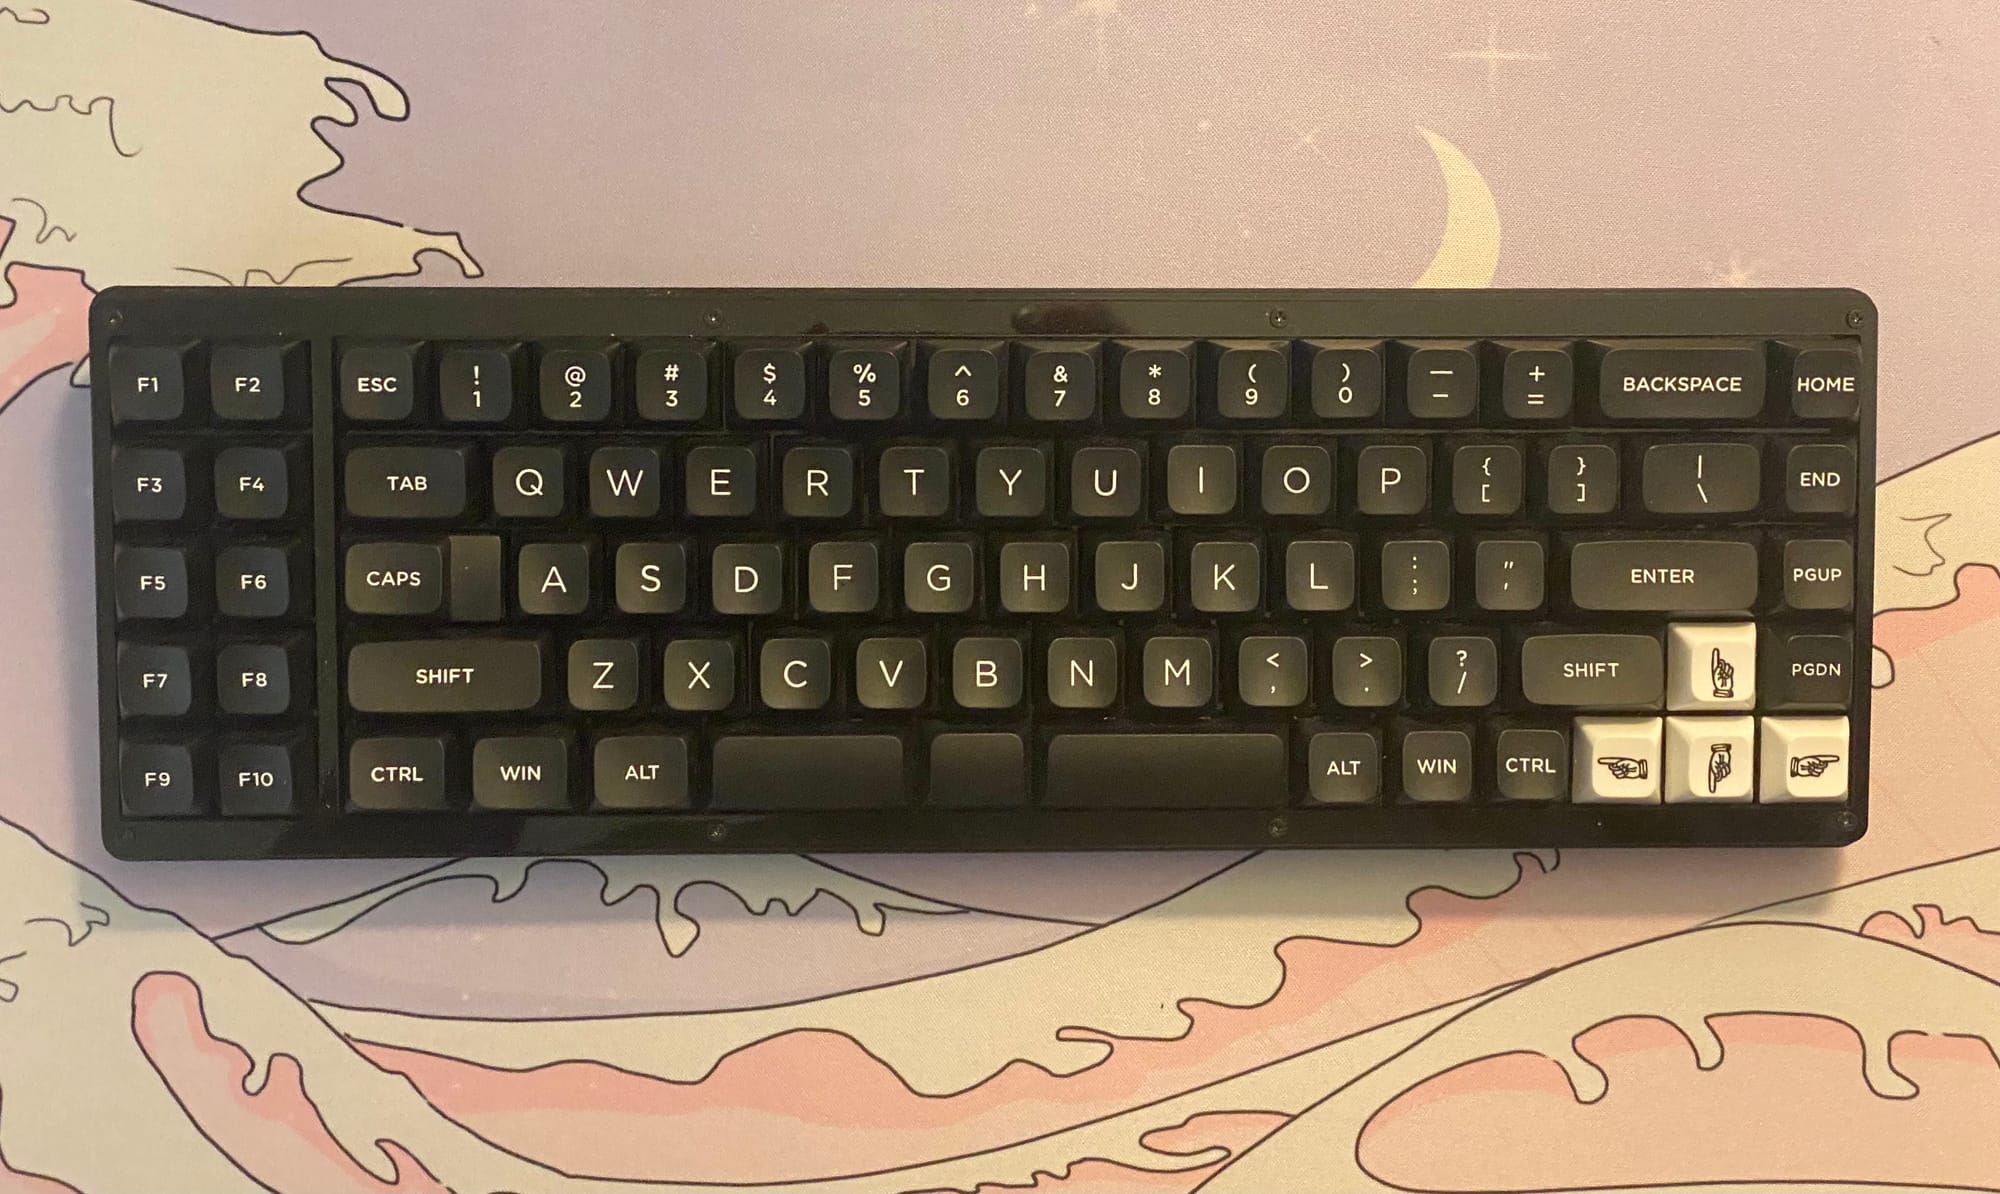
That left me with the question of what to do next. I didn’t quite feel ready to commission a PCB design, so I took another stab at finding a suitable existing 65% keyboard for testing purposes. I considered getting The Sedan from Clawsome Boards—a no-frills, affordable kit—but then I found the Convolution from Keebio. It had more features, including an integrated RP2040 and a nice layered acrylic case. Its layout was close to what I’d devised for the Lexicon, with the addition of a 2x5 set of function keys on the left side, like on an IBM Model F. It also happened to be on sale. When I checked the page after ordering, I found it showed as sold out, so I may have ordered the very last one. It would also be an easy build, since all the little components were pre-soldered. I ordered keycaps, stabilizers, and Gateron Yellow switches to complete it.
Being on the bleeding edge sometimes means getting cut, but neglected firmware profiles also can create problems. There’s a Convolution profile in the QMK repository, but when I tried to compile it, I got several errors I’d never seen before. I ended up having to disable encoders and RGB lighting to get it to compile at all. Luckily those things weren’t at all important to my project. I wasn't planning to use rotary encoders, and the black case (what they had in stock until yours truly came along) would hide the RGB lighting.
I’m generally a fan of the US Postal Service—I even have a toy mail van I got from their official online store—but I was annoyed that the package with the Convolution got delayed. Once it did arrive, it turned out to be one of the easier keyboard builds I’d done in a while. About the only part that was at all difficult was sorting out the bottom row. It has so many configurations that there are a ton of holes for switches, and I took to putting keycaps on switches before inserting them to figure out where they were supposed to go. The cheap ($20) XVX keycap set I got was expansive enough that I had all the keycaps I needed, and despite the issues with the encoders and LEDs, my revised firmware worked just fine. I also did a tape mod (where you apply masking tape to the back of the PCB) and put a sheet of EVA foam in the case, making sure to put holes in both for the reset switch and the mounting hardware. That improved the sound a little, though it wasn’t as pronounced as when I did the same with my QAZ.
It didn’t take me long to get the hang of the Convolution, though the twin columns of function keys on the left side did throw me off a bit. With the addition of F11 and F12, that particular convention of keyboard layouts went out of style in the 1980s in favor of the top row of function keys. On the other hand, having the Page Up/Down keys was nice, and something I considered adding to the Lexicon. Around the same time, I’d set up a KVM switch so I could more easily go between my work and personal computers, and I found that the Lexicon layout wasn’t especially useful for my work. At the time I was mostly typing abbreviated notes at work, which meant I didn’t use a lot of the common words that the Lexicon’s shortcuts help with. Later on, my work moved me to a different workflow that involved typing in more natural language, which made the Lexicon more useful.
The big thing I wanted to do now was refine the selection of combos for words. There were some I wanted to have (“should”) and some that seemed too easy to hit by accident. There’s probably some kind of mathematical analysis that could be helpful here, but that’s not exactly in my wheelhouse, so I was going more by vibes. In the course of trying out different combos, I also found that for some I hadn’t really thought about how easy or awkward they are to use. The combos for something and anything (SG and AG) made me stretch my fingers a bit out of a normal typing position, which wasn’t ideal. TO for “though” became ZO instead, and I made some other changes and additions. When I made a list of words I wanted to include, I found that I’d already put most of them in, so I also made a reference sheet, plus a spreadsheet to make it easier to sort and track these things. That was about when I started using Ⓦ and Ⓢ as shorthand for the Words and Symbols keys. While sifting through Unicode symbols I’d found that there’s a set of letters and numbers in circles.
Looking for more words to put in, I added Words layer shortcuts to the arrow keys for up, down, left, and right, and similarly made Shift and Enter really literal. They aren’t super common words, but the shortcuts are extremely easy to remember. I also found that there was a typo in the combo definitions where ⓌN was giving me “now” instead of “not.”
Another minor thing that came up was that I’d originally intended to have a 1u keycap for the Fn key between the Symbols and Words space bars, but the Convolution convinced me to change it to a slightly wider 1.25u, which was a little easier to press when I wanted to.
Overall, I had something I really liked. It was comfortable and fun to use, and it cut down on how much I needed to grab the mouse while writing.
Aesthetics
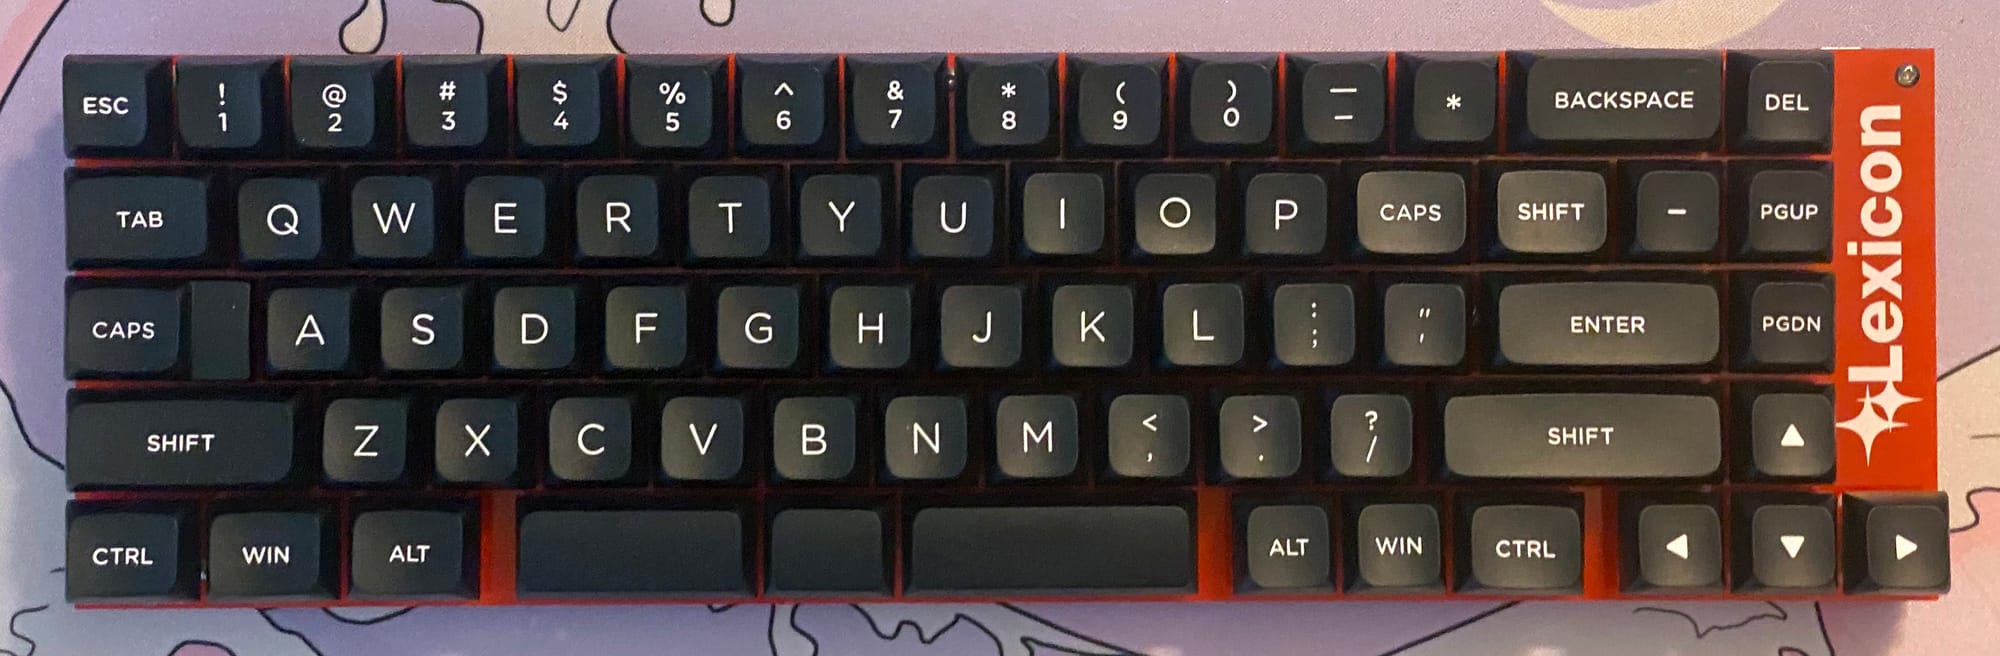
Playing around with my KLE design for the Lexicon, I tweaked it a bit so that it uses more standard widths of keycaps, both for compatibility with keycap sets and to make certain useful keys bigger. I did a lot of fiddling, and somehow the keyboard resolutely stayed at 69 keys (nice).
I had considered including a rotary encoder, possibly one of the horizontal roller ones, since it would make an amusing approximation of the scrolling knob of a typewriter. Unfortunately, I found that the EVQWGD001 roller knobs are a discontinued cell phone part, so they’d be a bit of a liability. I considered an OLED display as well, but decided it was overcomplicating things. The only practical use I had in mind was for a Caps Lock indicator, and since I’d kept the dedicated Caps Lock key, the user would have an easy time turning it off. I figured the extra space from these two omissions would be a good place to put the logo on the top plate and the MCU on the PCB, without it having to go opposite any key switches.
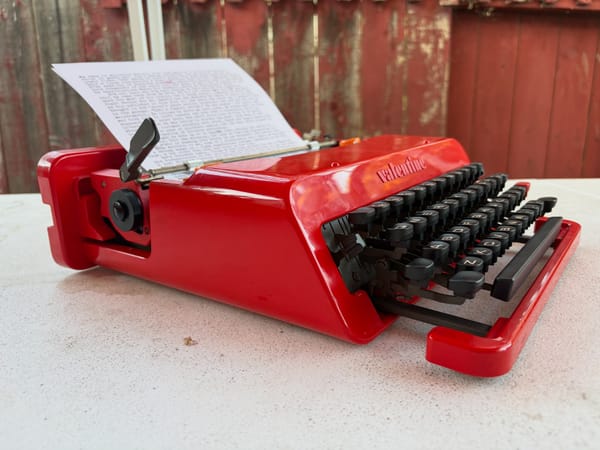
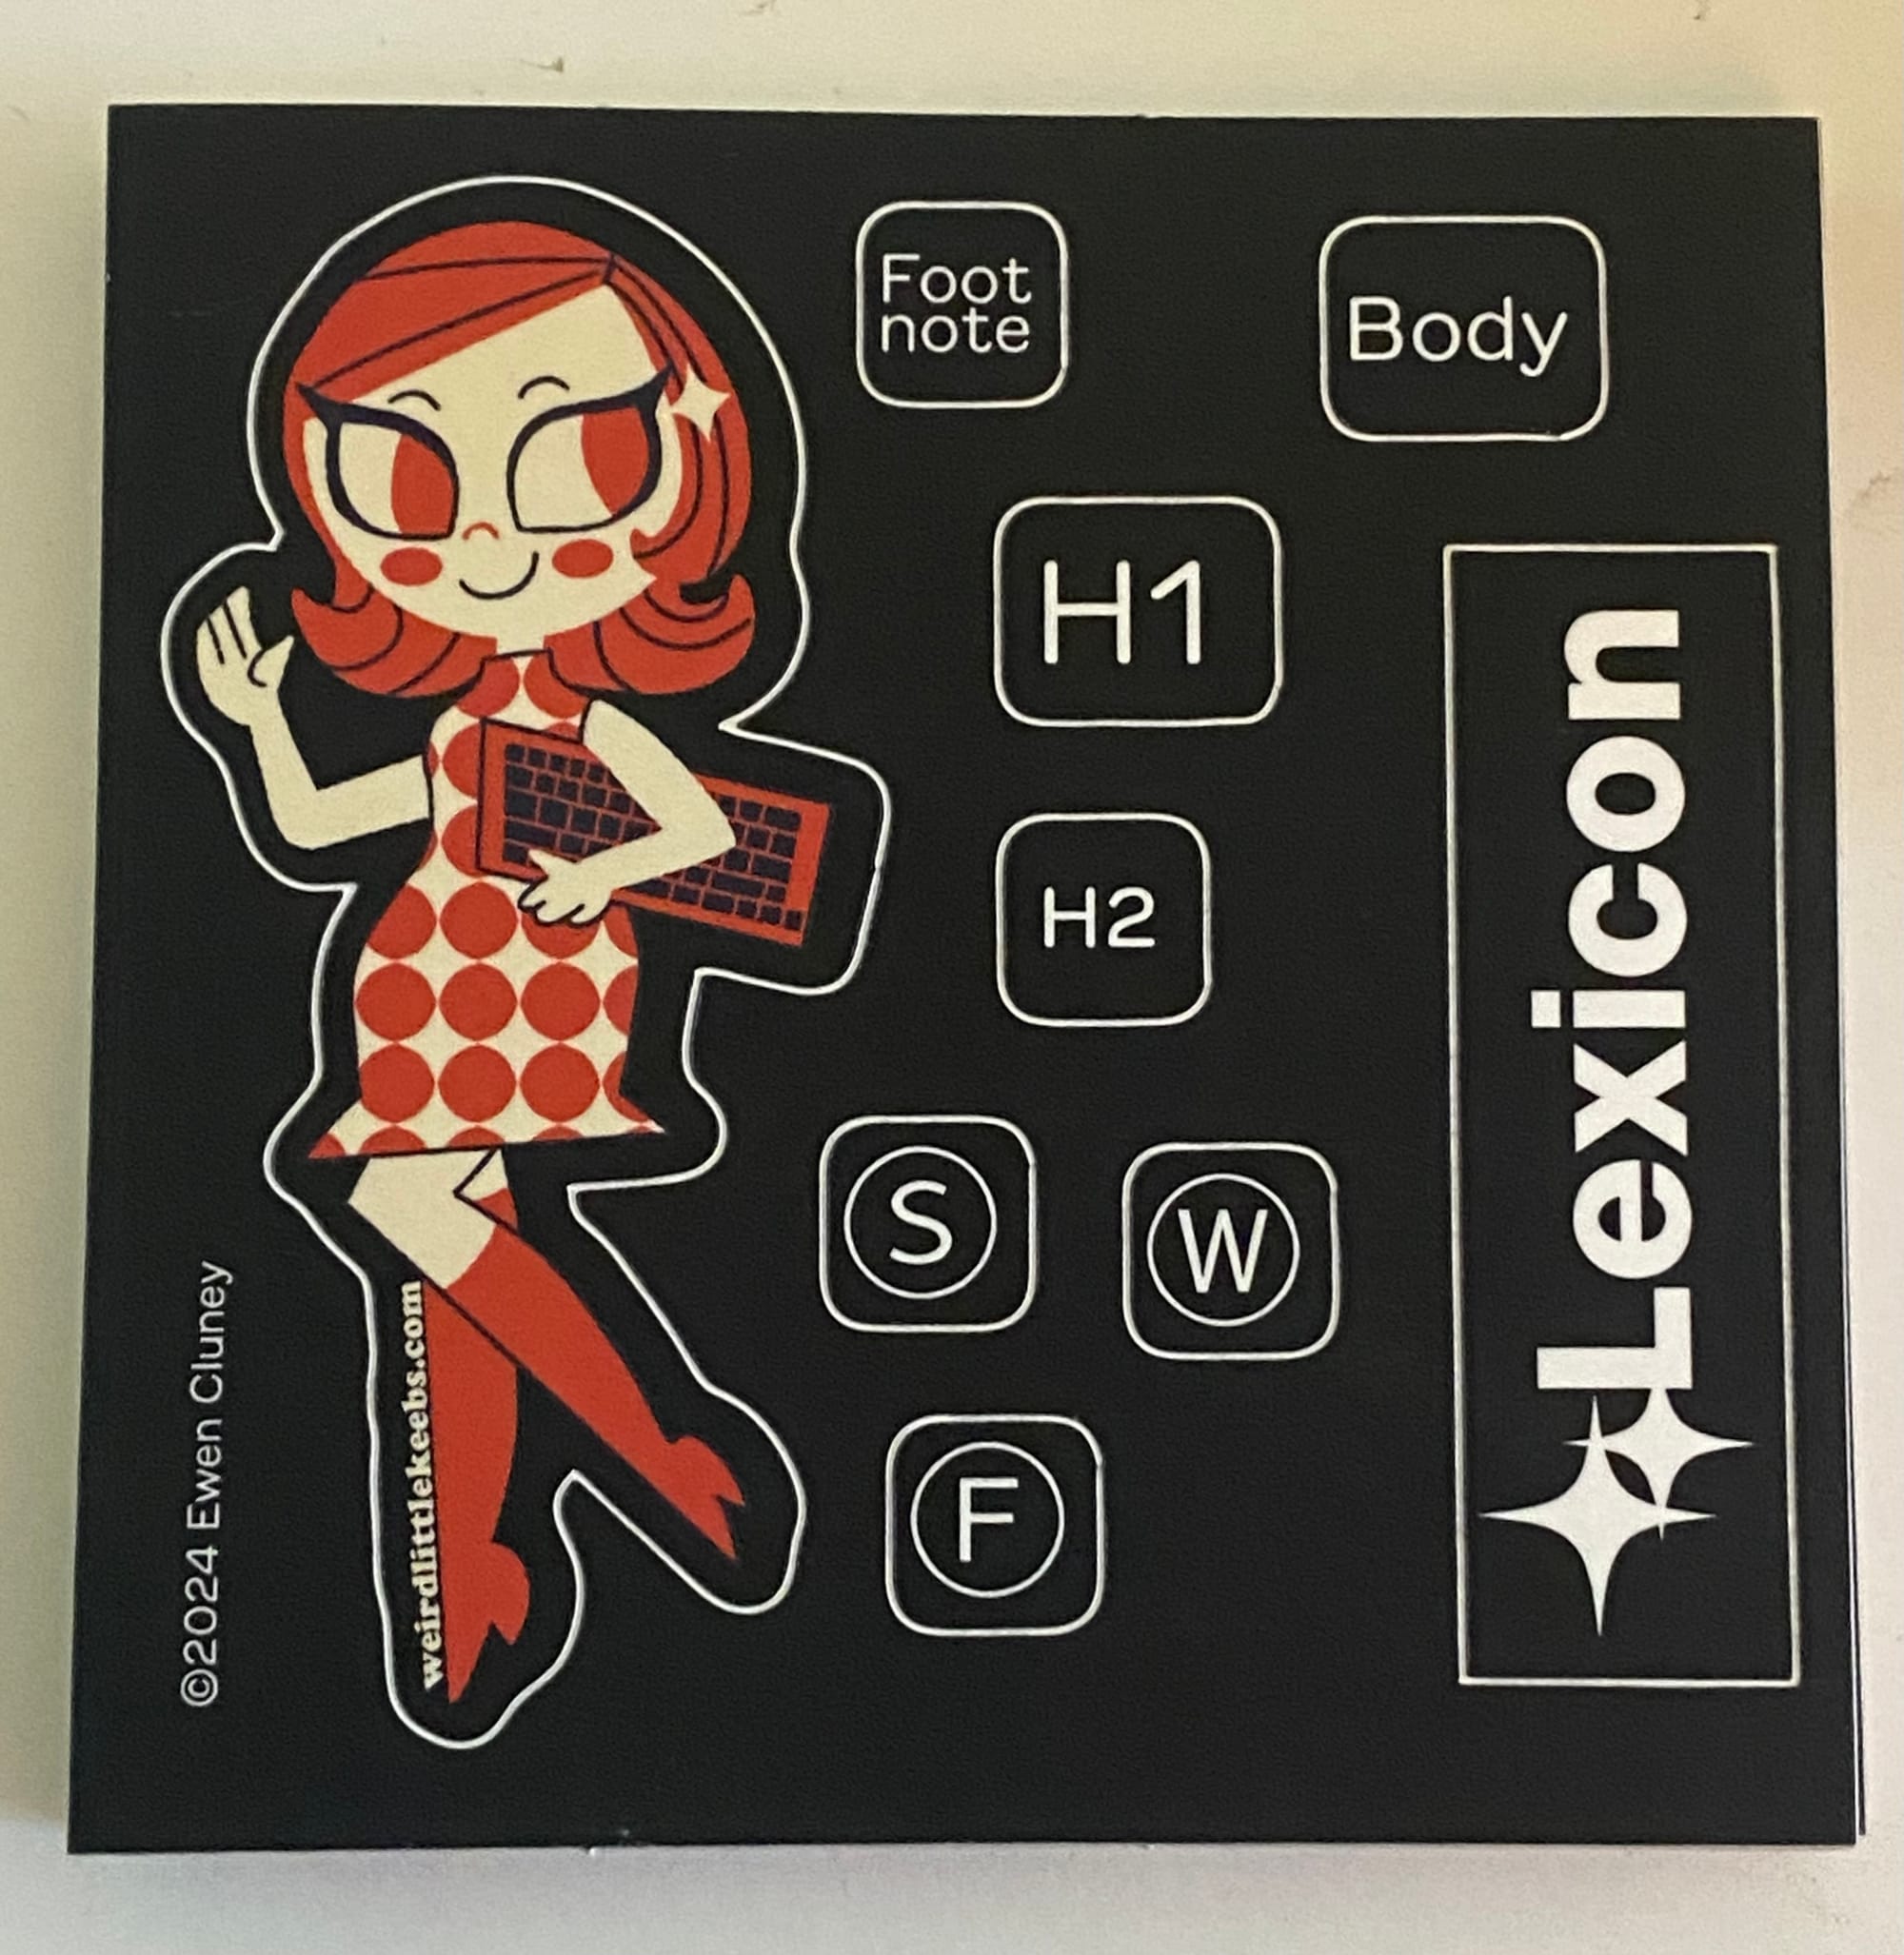
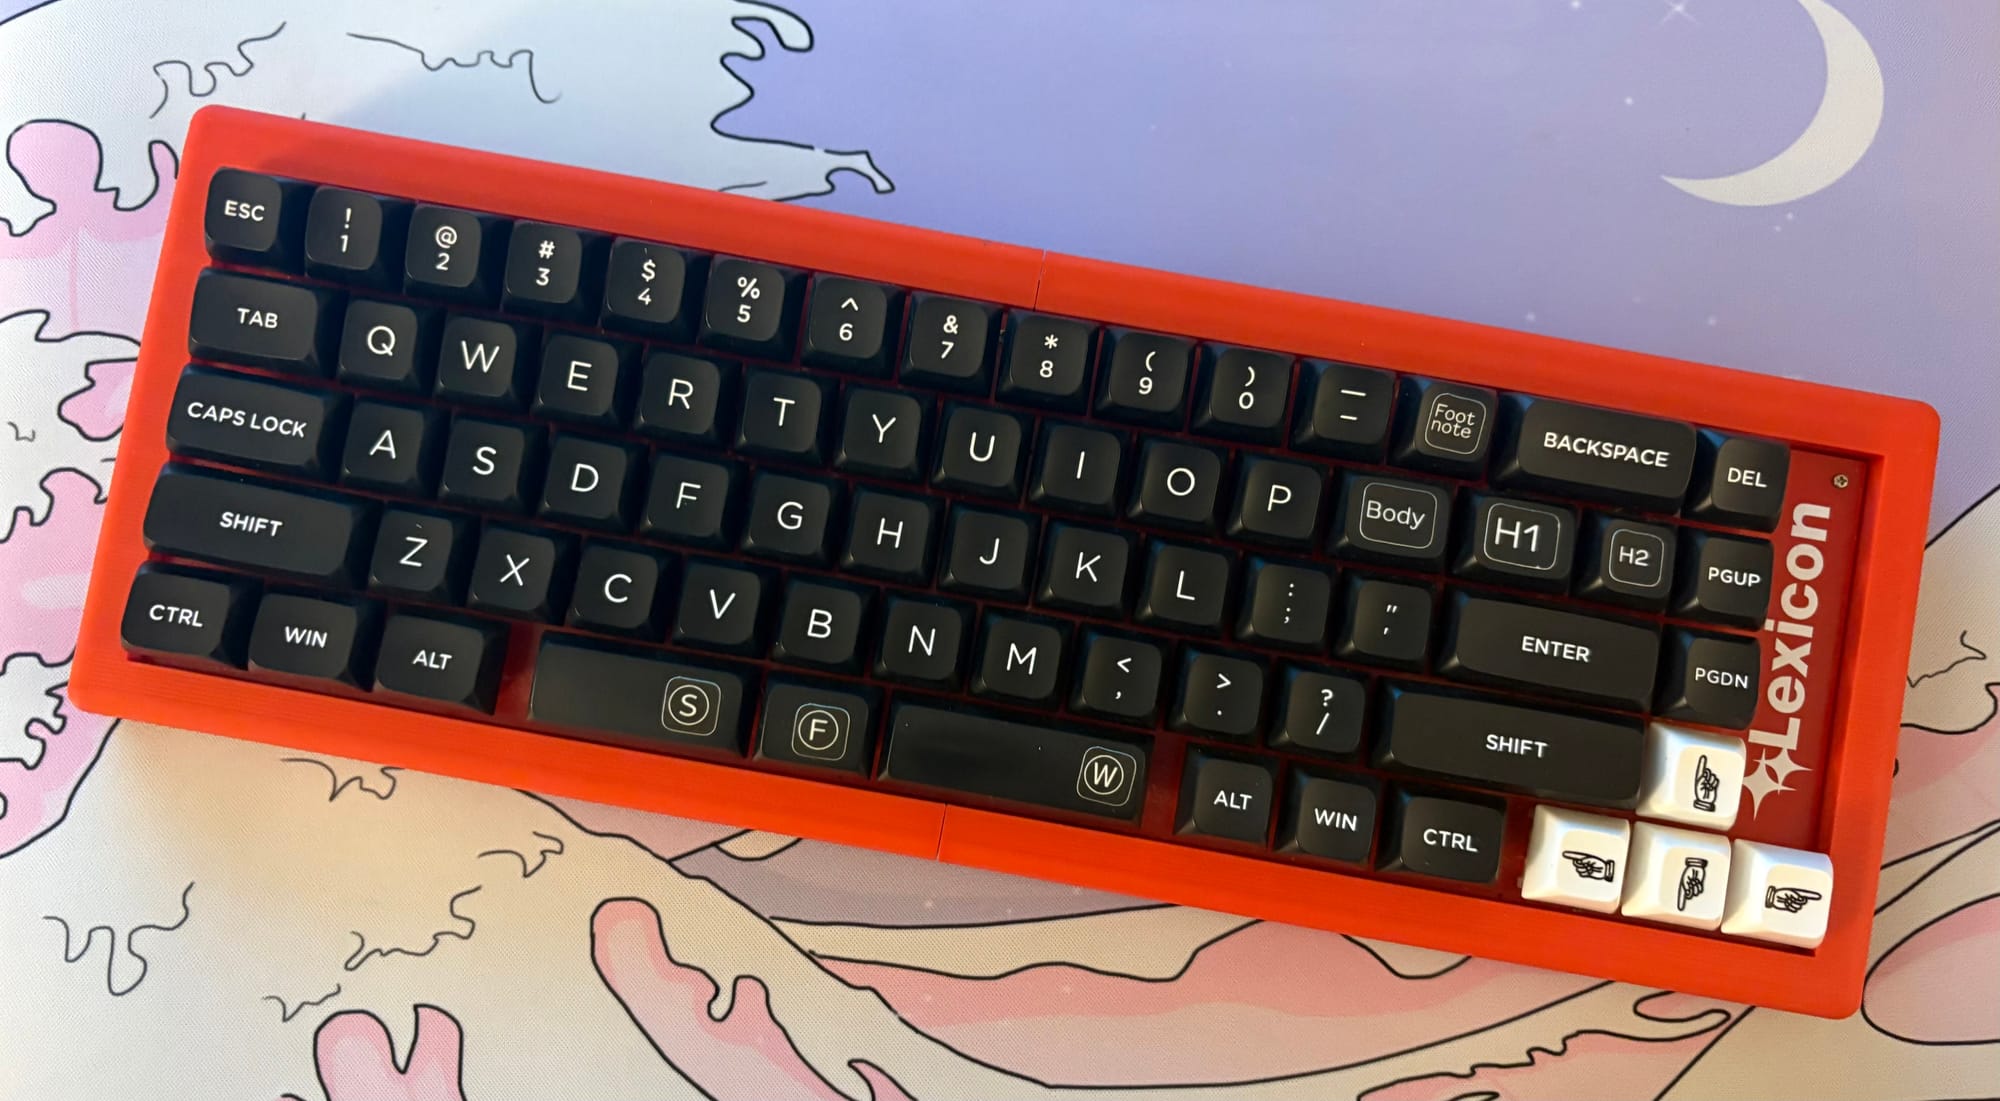
I also messed around with the colors. In KLE that’s purely cosmetic, but I realized I’d like to have the “canonical” version of the Lexicon be bright red with black keycaps, like the color scheme of the gorgeous Olivetti Valentine typewriter. I could order the PCBs in red and get black keycaps, and 3D-printed or laser-cut cases could similarly be in vivid red. I found a four-pointed starburst pattern that I really liked, a decidedly retro look that would be great for wallpaper in a room where you use an Olivetti Valentine. Inspired by the amazing silkscreen pattern on the Mt. Choc, I wanted at least the bottom plate to have that pattern. I also used those starbursts to make a simple logo, with the word “Lexicon” in Helvetica.
The aforementioned friend Steven Savage randomly gave me both volumes of Meet Mr. Product by Warren Dotz and Masud Husain, a pair of glossy books about old advertising mascots. I’m a sucker for midcentury retro aesthetics, so it was very much my jam. The mascots were usually cute and often bizarre, hailing from a different stratum of American culture. Between companies dying and changes in advertising, very few of those mascots are still around, and even fewer are unchanged. The “Bic Boy” for Bic pens is a rare living fossil among mascots, the only real change since 1961 being cleaner lines. Given the retro inspirations going into the Lexicon, it felt appropriate and fun to give it a mascot, and I quickly decided it would be a girl named Lexi. Having a mascot for a keyboard is a little weird, but there’s a long tradition of mascots for open-source software. Linux has Tux the penguin, GIMP has Wilbur the creature of indeterminate species, GitHub has Octocat, and so on.
Messing around with my iPad Mini and Apple Pencil, I arrived at a rough design for Lexi, with hairclips and a Mod dress that would use the four-pointed starburst shape I’d adopted as a motif. I used a color palette of nothing but black, white, and red, which would hopefully make it both more stylish and easier to print in various forms. My second sketch made her look a little older and gave her chunky boots, a Bakelite bracelet, and the keyboard under one arm. My third gave her a flip hairstyle. None of this was in any way necessary to the keyboard, but it wound up being one of the most fun parts of this whole endeavor. Lexi has the feel of a young, vivacious typist from the 50s or 60s, though in an optimistic cartoon world where the sexism women encountered in real life office work isn’t an issue.

Regardless, I figured I’d work her into the PCB silkscreen in some fashion, and get some stickers made too, to be included with each unit I sold. My own artistic abilities are kind of basic, enough to get the point across, so I’d have to commission an actual artist to do a better version for actual use. I’ve been commissioning art for a long time, but the artists I know and get stuff from mostly do anime/manga inspired stuff. Finding artists is a little more challenging these days, since posting “I’m looking for an artist” on social media will get you a deluge of spam. Thankfully, a friend had linked to a site called Vgen, a marketplace for art commissions. I found an artist who goes by retrotv5000, who has some anime inspiration in her work but a retro illustration style.
By the time she was ready to start on the artwork, it had become the last thing I needed before I got into the Actual Prototype. Different artists handle commissions differently, and it turned out that retrotv5000 was the type to pop up with a stunning finished piece rather than showing the client sketches. She gave Lexi high heeled boots and left out the bracelet. I considered asking her to add the bracelet back in, but looking at the finished art I felt that it wouldn’t improve things. Good artists give you what you asked for, and great artists give you what you didn’t know you wanted. This was exactly what I wanted that then some, and I can easily imagine Lexi living in the same world as Jucika.

I went ahead and ordered stickers from StickerApp. There are tons of companies that can make custom stickers, but I’ve had good experiences with StickerApp, plus they have a lots of options for finishes and such. I added the weirdlittlekeebs.com URL, then after going through a bunch of different fonts settled on Cooper Black, which went better with Lexi’s retro design.
Actual Prototype
I finally felt ready to move on to a real prototype of my own design. I don’t have the skills to put together schematics and PCB designs myself, so I instead went to Fiverr, specifically to Supul (a.k.a. circuitwork32), a Sri Lankan engineer who I’d previously hired to do up my Peridot and Titan keyboards. That meant I really needed to have the specifics sorted out, so I made a set of instructions for him. I have decidedly mixed feelings about Fiverr and how exploitative it can be, but this at least is paying a professional to do technical work rather than something humiliating. As before, I made a point to give a generous tip. There are other PCB designers who take commissions (including on Fiverr), but I can say that I’ve had good experiences with Supul across three projects now.
I decided to go for an integrated RP2040 chip. It would be my first time getting PCBs made with components pre-soldered, but I’d had such good experiences with the Convolution and the new RP2040-powered QAZ that it felt like the right way to go. Hopefully it will make things easier for everyone concerned. I was planning to send prototypes to a few people for testing, so it would be nice to not have to solder diodes and whatnot for each one.
I had the idea to have footprints that allow for MX switches to be attached via either soldering or hotswap—inspired by the Piantor keyboard—but since the holes for stabilizers are asymmetrical, I didn’t see a good way to implement that. The Piantor only uses Choc switches and 1u keycaps, so stabilizers aren’t a concern. Instead, I opted for soldered MX-only footprints, to keep things simple and easy on that front. Although I love Choc switches and have nothing against Alps ones, they just didn’t quite fit the Lexicon 69.
I opted for a sandwich case as the default, as it’s the easiest to manufacture. It also wouldn’t be hard to create other kinds of cases. Inspired by the Contra and Convolution, I asked for a hole in the bottom plate that would make it easy to access the reset switch with a screwdriver or similar.
I also needed to get the PCB art sorted out. Luckily it wasn’t too difficult to open the Lexi art in Adobe Illustrator, convert it into a vector format, and recolor it to be white on red. I really need to sit down and properly learn Illustrator, but for now I can get by with googling the things I want to do with it. From there it was easy to turn the starburst into a pattern, put it on a red background roughly the size of a 65% keyboard, and add the monochrome Lexi with a red “halo” so the pattern didn’t make it hard to see her.

With my images and instructions done, I found myself ready to put in the commission. I’ve done enough projects and commissions over the years that they don’t have quite the same glow of excitement, but getting those first renders was still great. Supul put the USB connector, the reset switch, the RP2040, and the other components that directly support the MCU in that blank spot on the right side. He asked for the bottom plate art to be both in a raster format and to be larger to fit the board, so I had to redo it in the proper size and convert it to a .png file, which was easy enough.
Fabrication & Firmware
Armed with the Gerber files, it was time to order stuff. When I order PCBs I always get multiple types to save on shipping, and I keep a running list of which ones I want to order next. This time around I got Chouchou, CYOA Ortho, Quill, Mushi, and Masonry PCBs along with the first Lexicon boards. I also restocked Sofle PCBs and got some Reviung41 plates.
For the Lexicon, ordering five boards (the minimum order) cost $13 for the actual boards and another $45 for the components and assembly. $9 is a great price for diodes and the equivalent of an MCU for a single keyboard, especially when they’re pre-soldered. The RP2040 chips were about a dollar each, though they need some other components to regulate current and such.
I’d been a little intimidated due to the time I uploaded the production files for the Corne v4 and found that five of them would cost around $130, but the addition of LEDs and hotswap sockets really added up. The other boards I ordered plus shipping brought the total up to about $500, the single biggest PCB order I’ve done so far. The box that eventually arrived at my house weighed about 25 pounds in all. I have no doubt there are folks who’ve put in PCB orders that require forklifts, but that was nonetheless a new record for me.
Supul sent me a config.h file to use (since I don’t know how to extract the pin assignments from KiCad files), but otherwise I had to sort out the firmware myself. Luckily that’s something I have a lot of experience with. The Keyboard Firmware Builder can take the raw data from KLE and spit out a basic QMK firmware profile, which saved me the trouble of sorting out the lexicon.h file (which maps out the physical layout) and the basic keymap. A lot of what remained was just a matter of adapting my Convolution keymap.
To make things a little easier for myself and anyone who messes with the keymaps, I created a separate file with aliases for the key combinations for formatting commands, the idea being that you can move some comment markers around to quickly change what those shortcut keys do without having to touch the keymap.
I’m always pleasantly surprised when the firmware compiles on the first try without any errors or warnings, and that was not what happened with the Lexicon firmware. It first came up with an error saying that there were too many elements in the LAYOUT array, which normally means I messed up somewhere in the keymap, putting in too many keycodes or maybe a stray comma. After giving myself a headache counting keycodes and entries in the lexicon.h file, I finally asked for help. I emailed my online friend Phoebe, who is a programmer who’s into DIY keyboards (my other programmer friends, as great as they are, are not keyboard people), who determined that the Builder had put extra KC_NO tags in the lexicon.h file, such that QMK thought the keyboard had 17 columns and was complaining about the config.h file (correctly) specifying 15.
Finally, the box of PCBs showed up at my house. I was able to flash it without any issues, and it was as easy to put together as I’d hoped. The sole issue that came up with the hardware was that the hole in the top plate for the Caps Lock was only for the non-stepped position. I didn’t have to do another order of boards to have a working prototype, but I did need to ask Supul to fix it.
Once I had a board assembled and the firmware compiled and flashed, I found that a few keys (A, Z, and one of the spacebars) weren’t working, and several key functions were shifted to the right. This was an issue with the lexicon.h file’s matrix definition, but my attempts to fix it didn’t do anything. Apparently the Keyboard Firmware Builder doesn’t work right for RP2040-based boards. Since Supul was busy at the time, I ended up asking another keyboard designer on Fiverr (a Filipino guy who goes by DeskDaily) to fix the firmware. He handled it quickly, and even added VIA support. That’s something I haven’t yet learned how to do myself, but it involves creating a JSON file so that VIA knows the physical layout. Given how many people ask for help customizing layouts, that would be nice to have.
It was a relief to finally have that sorted out, and I went to bed feeling downright giddy about having working Lexicon keyboards at last. I was left with the task of filling out the rest of the firmware with the Lexicon functionality, and I’ve genuinely lost count of how many times I’ve done that. I made a few small mistakes that were easy to fix, but overall it went smoothly. Still, part of why I’m not a coder myself is I’d probably give myself concussions from slapping my forehead and going, “Duh, it needs a comma there!” all the time.
Supul sent me a message saying he hadn’t been feeling well, but he’d try to get the Caps Lock issue taken care of by the next day. As of this writing I haven’t heard back from him, and… that really sucks. I’ve been on the internet long enough that I’ve had plenty of online friends and acquaintances drift away, but I simply have no way of knowing what happened to Supul. He could just be gone—Sri Lanka was having its share of strife at that time—or he could be living his best life and ignoring Fiverr messages. I truly hope he’s okay.
Testing
Since I intended the Lexicon to be accessible to people who aren’t total mechanical keyboard weirdos, I couldn’t rely on testing it by myself. Luckily, I have some friends who are squarely in the target audience. I wouldn’t be able to do the kinds of deep analysis I’d read about in a book on human-computer interaction, partly because I lack the training and partly because my concerns are a bit fuzzy in the first place. I’m not after people who want to maximize WPM. Prose writing benefits from speed to some extent, but it’s more important to be able to fluidly get the words out. I was thus more than anything looking to ensure that using the Lexicon is fun and its features weren’t causing frustration.
That also meant that I needed to finish up the manual and build some that I could send to my guinea pigs. Steven was at the top of my list, since he’s both a writer and is local. Other potential candidates were further away, but I was going to have to buy bigger shipping boxes for the Lexicon regardless. The aforementioned Phoebe and my comic artist friend C. Ellis enthusiastically agreed to do testing as well. It turned out that C. uses Pages, so I wound up including it in the word processors I was covering after all. I was a little annoyed at Apple for not including all that many keyboard shortcuts in Pages, though you can at least define some yourself if you know how. Phoebe meanwhile uses Scrivener—a word processor specifically made for writers—but since she knows programming and whatnot better than I do, I asked her to handle the Scrivener implementation herself. That still left me with several keymap variants to create and compile, and thankfully I’d managed to make that fairly easy for myself.
I ordered sets of keycaps and stabilizers, and enough Gateron Yellow switches that I briefly had a jar of about 340 of them. I also got myself an orange canvas carrying bag, made by a Korean keyboard company called Leopold.
Just as I had the first one packed up and ready to ship out to Phoebe, I found that the right arrow key on mine wasn’t working. I couldn’t find anything wrong in the firmware, and it turned out that I’d managed to totally miss soldering that switch. A quick bit of soldering and it was fine, and I hadn’t missed a glaring flaw in the PCB design or anything else that would cause a massive hassle. I made a point to be more thorough on the remaining test units.
I turned all five sets of PCBs and plates into working keyboards, sending three to my guinea pigs and keeping two so I could more easily test them myself on both my Windows and Mac machines. It turned out that macOS has a way to do Unicode input built-in, though it’s a little annoying. You have to add Unicode Hex Input to your keyboard languages and then switch to it, and since it uses the Option key, it prevents you from using the normal macOS option key shortcuts for extended characters. I considered replacing the Unicode shortcuts with macOS character shortcuts, but the selection just didn’t cover what I wanted it to, plus it would be redundant with the Option key. I could turn that space bar into a mod tap I suppose. On the plus side, I found out that ChromeOS has the same Unicode shortcut as Linux.
C. meanwhile excitedly opened the box when it arrived and not long after texted me to say that the manual had reminded her that I’m “an amazingly intelligent polymath.” I do not often feel like it, especially when I look at my bank balance, but I’m normally so down on myself that I need a boost now and then.
Phoebe took to the Lexicon quickly, and one bit of feedback she had was that it was a little annoying that there wasn’t a good way to capitalize words that came from the shortcuts. QMK’s string output activates all at once, so if you hold down Shift while using one, you get the word in all caps. Some applications have autocorrect that will (usually) capitalize words where required, but not all, plus in writing you sometimes want to capitalize words for titles and such. QMK has some interesting features to do with capitalization and even a whole autocorrect capability, but not a “capitalize next word” feature.
Phoebe took it upon herself to see if she could create one. She quickly sent me a revised version of the firmware that made it so that holding Shift makes Words layer shortcuts come out with only the first letter capitalized. It’s a little over my head, but she essentially created a thing that checks for the state of the Shift key and delivers a different string if it’s being held down. The strings are arbitrary, and I realized that you could put any secondary output in there you want. That meant the Ⓦ.’s “.com” output could be shifted to “.net,” and when I went to implement that I found that Phoebe was way ahead of me. She’s also had it so that ⓌEsc is “ing” but Shift-ⓌEsc is “ed.” All of this required removing the word shortcut where ⓌShift outputs the word “shift,” but I don’t think I used it even once so no big loss. I found that some quirk of QMK was making non-capitalized stuff in the capitalized value show up in all caps, and I found a kludge to deal with it, by adding “A\b” before those ones, so that it would type a capital A, do a backspace, and then type the word. It’s silly, but it works.
Because of how combos work in QMK, holding Shift and using a word combo will still give you the word all in caps, but pressing it simultaneously with Shift capitalizes the first letter. It takes a little finesse to use, but it does work.
With so many people lending their assistance, I ended up adding a credits section to the manual with six names listed, not including myself or the Special Thanks. The manual has a bit more of a human touch than is typical for a piece of electronics, but this is a keyboard for a bit more of a human activity. Also, it’s just my style of writing in general, though I tried to be more succinct and utilitarian than usual.
I also found that with the specific memory module the Lexicon uses, QMK can’t enable the thing where you can double-tap the reset button to put it into bootloader mode. That module does have the virtue of holding a whopping 16 megabytes (whopping by keyboard firmware standards at least), so I can’t really complain. I was able to set up a hotkey to put it into bootloader mode instead, which has the virtue that you don’t have to pick up the keyboard and poke a small object into the hole on the back. I hadn’t used the boot keycode before, and I found it’s really nice as long as you avoid hitting it accidentally.
Since QMK’s Unicode output feature lets you specify a different character when holding Shift, I added a few more, so that you could get hollow or filled versions of shapes like ★☆⏺○▲△□■. I didn’t go as far as to try to give every key an alternate Unicode symbol, since I’d already exhausted most of the ones people actually use and then some.
Phoebe also promptly added stickers to the keys that weren’t available with legends in a normal keycap set, which eventually led me to the idea to create a small sticker sheet so I could just include those labels plus a Lexi and a Lexicon logo with each board. I ended up ordering from StickerApp again, since their sticker sheets allow for more precise cuts than some of the competition.
Release
I settled on calling the keyboard simply the Lexicon, with Lexicon 69 being an alternate name that appears on the bottom of the PCB. Its other nickname would be the Cluney №3, following the convention of early typewriters being called things like “Remington №2.” With a Lexicon it’s easy to type the numero symbol no less.
Although it doesn’t need a lot of parts, I decided to sell the Lexicon PCB as a kit with the screws, standoffs, and rubber feet included. They’re small parts that you can’t really get in small quantities, and the more casual audience would hopefully appreciate me removing that bit of hassle. That required me to count standoffs and screws by hand and put them into little baggies for my initial run of 20 units to sell.
Where I made my previous keyboards open-source, I decided that to start with the Lexicon hardware would be closed-source. A lot of work went into it, and although the development process was much cheaper than it could’ve been, the costs were enough that I hoped to recoup them. One thing I like about Keebio is that they’ve done open-source releases of the designs they’ve retired from retail sales (notably the Quefrency and Fourier), ensuring that those keyboards aren’t dependent on commercial viability to continue existing. That would be my preliminary plan for the Lexicon. I've since made it available under a Creative Commons Attribution-NonCommercial license, though I don't know of anyone who's gotten their own Lexicon PCBs made.
Conclusions and Future Plans
When you create a character for a TTRPG, there’s sort of a conversation between the ideas in your head and the constraints of the game. In D&D you may start with a clear concept or just see what the dice give you in the way of stats, but it’s never entirely your raw creativity or just the game’s rules. It’s easier to be creative with a certain amount of constraints rather than just a blank page, and working within the bounds of a conventional keyboard built around a rectangular PCB and QMK firmware certainly imposes constraints. I was limited by what I could produce as a physical artifact, the conventions of keyboard design, and the things QMK can and can’t do. A mass-produced Lexicon with its own injection-molded case and keycaps, with firmware entirely by pros, could ignore more of those limitations, but it would also have a very steep price tag and require production at a volume for which there may not be a market. I would love to get there, but I’m starting small and seeing where things go.
So far, the Lexicon hasn’t exactly set the world on fire. That may have more to do with me not having any idea how to do marketing than anything, but it was always a possibility. I did get a new daily driver out of it, and I now find typing without all those word shortcuts a little annoying. The handful of people who’ve bought Lexicons have had nothing but praise, and both Keyboard Builder’s Digest and the Hackaday.io blog posted about it, both praising a neat idea.
A while after I'd gotten the Lexicon out into the world, Freewrite announced the Wordrunner, another keyboard aimed at writers. It's an 80%/Tenkeyless keyboard that replaces the function keys with shortcuts for writing, and sports a word counter. I distinctly remember them initially marketing it as the first keyboard for writers, but I don't see that verbiage on the website now. I don't know if it's because I beat them to the punch, but I'm not going to be mad about the overall concept getting more traction. They have a very different idea about what a writing keyboard should be like, though some of the difference comes from theirs being more engineered and having an MSRP of $459. I sell pre-built Lexicon keyboards for $150 and kits for $70, so I definitely have them beat on price at least.
The biggest new development with the Lexicon is that I got my friend Yenway to design a 3D-printable case. It makes the keyboard a little too big for my Leopold carrying case, but it also looks great and makes it feel more like a professionally-made keyboard. The PLA case doesn't have amazing acoustics, but it lets me do tape and foam mods, which are a significant improvement over the sandwich case.
I'm planning to refine the firmware further, with the biggest change being having it add a space after word outputs. I realized that the number of times it calls for a space after substantially outweighs the number of times it doesn't, and it's more efficient overall to backspace for the latter. I also have a notion to work out more combos using the number keys, things like pressing 3 and 0 simultaneously producing "thirty," and combinations of numbers and letters, like A8 being "ate." Naturally if I do this, pressing 6 and 9 will give you "nice."
With the current erratic tariff situation, I haven't been doing any new keyboard design work, but I have several ideas for further keyboards in a Lexicon series. The main one I want to pursue is the “Lexicon Ergo,” which would have some kind of column-staggered ergonomic layout. Not unlike with the original Lexicon, I’m starting by implementing the concept on existing designs, specifically a Reviung41 and Atreus62. I also have a notion to do a "Lexicon Deluxe," which would be a variant of the original 65% version with added bells and whistles like hotswap sockets, an encoder, OLED display, etc. But all of that has to wait until I have more money to work with and don't have to worry about tariffs inflating the cost.